
Contouring is the makeup technique of the moment.
The application of contouring sounds easy, but boy can it go terribly wrong if you use incorrect shades for your skin tone. When applied correctly it is the anti-ageing genius of makeup artistry.
WHAT IS CONTOURING?
Contouring consists of highlight and shade. Highlight is used to add light to the face, like a spotlight and will bring areas forward. Contour is the face shaper, it is used to re-define and sharpen features, creating a hollow to recede areas.
When used together they create a contrast which is how we get such instant results. Add some good lighting and you can appear years younger!
MB PRO TIP: Every makeup decision I make is relevant to the results by using highlight and shade. Always ask yourself, do I want to bring forward this area, or hide it?
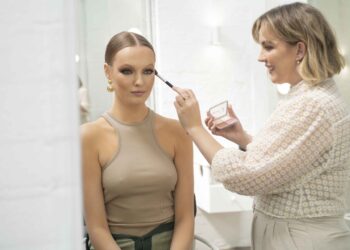
Watch below as Michael Brown demonstrates how to contour. You don’t need to be a pro to follow these simple steps and achieve a perfect contoured look.
COMPLEXION
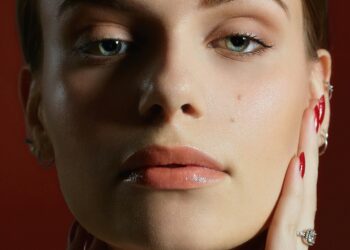
This is the most talked about parts of contouring, as it is where we can re-define our facial features.
Using something as simple as a lighter shade concealer to your skin tone on the highlight points of the face – cheekbone, brow bone, centre of face, cupids bow of top lip and the chin – will bring forward and lift these areas naturally as they will reflect the light and appear bigger and more forward.
I prefer a concealer or liquid/cream highlighter than a powder as powder can be a tad dry and fall into expression lines easily.
For a shade tone, something quick and easy is your daily bronzer. As long as it is matte, it will sharpen up your features when placed in the hollows of your face, contrasting against the light of your highlight.
MB PRO TIP: Never go more than two shades lighter or darker than your skin tone with highlight and shade – we want realistic, blended beauty not stripy lines all over our face.
EYES
For eyes, the main concern is the eye socket area – this is where we tend to get a little puffiness, or a folding eyelid, looking heavy or downturned. The more shade we place on this area, the more lift and structure we gain. For this, I always use my bronzer as bit of a stencil to map out the shape I want and to give better blend than going straight in with a very heavy depth shade – it’s easier to build depth than to remove!
Less light on the eyes is actually more anti-ageing – the more light we have could bring forward areas we are trying to recede, so go easy on highlighting the eyes as more shade will lift and open your eyes. Keep any light/metallic shades on the mobile eyelid to attract light when eyes are in motion, allowing your socket to always be structured with a matte shade to the depth of your choice.
MB PRO TIP: Once you believe you have added enough shade to your socket area, open it, relax it naturally and look forward to see where your eyelid skin sits and blend/shade accordingly. You want to recede back any unwanted skin that is puffy or heavy, which is hard to do when the eye is closed and the skin is stretched.
LIPS
Even with lips, we need to think about if we need more highlight or shade. The majority of women want bigger and fuller lips, therefore nice bold shades with a hint of shine work best. If you have very large lips and want them looking smaller, it’s best to use deeper, matte shades – it’s all about the balance.
MB PRO TIP: I love to play with and mix colours and quite often for lips I use a slightly deeper shade on the outer areas and then a brighter shade on centre area, this gives great plump to the mouth.
Follow Michael Brown: Website | Facebook | Twitter | Instagram
feature image via pinterest


