
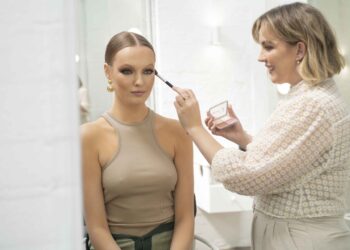
More than ever, flawless beauty is a huge trend. It suits everyone, you don’t need too many products and it sculpts the face for lift with accents on the brows, lip and lash. Winning!
The no-makeup, makeup look is all about skin prep – adding light to the complexion with simple sculpting (not over contouring).
With ‘active lifestyles’ also a trend, women are opting for quick and easy makeup looks, demonstrating a youthful glow with minimal touch ups – the more you apply, the more can go wrong.
Using the correct tones are key to achieve a lifted, fresh result and once you accent the brow and lash line, the overall look can appear carefree plus anti-ageing.
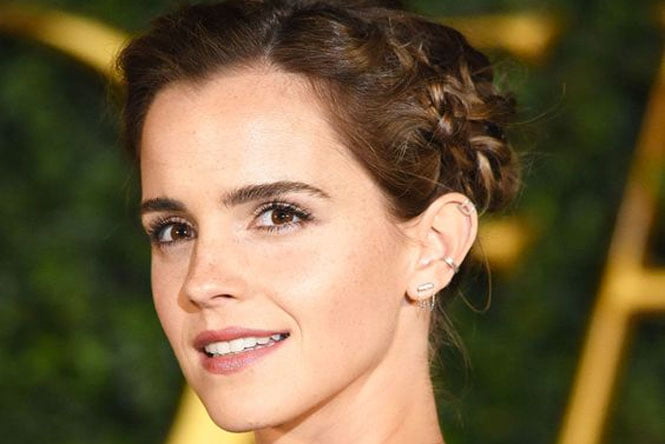 Image via pinterest
SKIN PREP
I always use something quite hydrating as a moisturiser, nothing too rich (even if you have dry skin) as foundation may slip throughout the day.
A water-based product is much faster absorbing than a rich, cream style moisturiser; therefore foundation will bond to the skin perfectly.
Apart from your usual skincare routine (please tell me you use one). I would add a great primer and illuminator to the face before applying any foundation and/or concealer.
It seems like extra steps, but if you spend the extra 2 minutes prepping the skin (mattifying/smoothing primer in the centre of the face and an illuminator on the frontal bones, especially the cheekbones) your skin will already have a glow before applying foundation. This means foundation appears more like real skin!
FOUNDATION/CONCEALER
Gone are the days of covering the entire face with a foundation product. No one has the same tone over the entire face, so if you cover the whole area, it can appear to be mask-like.
Find the areas that need coverage and work with them first. Usually the under eye and centre of the face are areas to concentrate on.
Adding coverage under eye and sides of the nose before anything else can sometimes make the biggest difference to the freshness of our look.
Once this is done, take a step back and think, do I really need to apply more product? Sometimes no, less is best!
If you do need to apply a little more product, always start your application from the centre of the face, sweeping outwards. This way your foundation is blended perfectly with no build up of colour.
SCUPLTING
Also known as contouring, but not the painted stripy versions you may of seen on instagram.
Sculpting is basically applying a matte taupe-bronzer shade to areas of the face you want to recede to create lift.
These types of shades may not look like much in packaging. But when applied to the correct areas of the face, they can sculpt, re-shape and lift your face, putting your best face forward, naturally.
Where to sculpt
– Under Cheekbone: Most common area to ‘contour’ as it lifts and shapes the entire face by creating a hollow under the cheekbone.
– Eye Socket: Perfect for hiding puffiness or heavy lids and best applied when eyes are open to see where the skin sits naturally.
– Top and Lower Lash Lines: This shade is perfect to add depth, opening the eyes further and matching the socket. Apply a sculpt shade to the under lash line,as it can cut away puffiness.
– Temples/Forehead: Only necessary if you have a larger forehead, this can create the illusion there is less space present.
– Jawline: Great for the rounder face shapes or when there is less shape around this area of the face.
POP POINTS
With our skin glowing and looking fresh, plus our bone structure sculpted to add a lifting effect to the face, all that’s left is our 3 pop points to finish this look.
Lashes
Once the eye has been sculpted within the socket area and the actual lash line. Sometimes all you need is a good layer of deep black mascara to add extra depth, lift and contrast to your eye colour.
For extra lift, either smudge a kohl pencil in the outer upper lash line, diagonally up to the outer point of the brow or with an angled brush, place a mini wing (with eye open for best upward placement) and this will give extra lift to the eyes.
Brow
Brows are a huge trend going forward. They lift, frame and can cut out unwanted space in the eye by going a touch thicker. Bye bye thin brows!
Just by brushing your brow hairs upward can give great fullness and lift to the face. Yes, it’s that simple.
But, with a touch of brow powder (even taupe eye shadow), pencil (if you want more placement) you can fill in any gaps that your brow has to get back full density.
I like to apply a little brow colour just above the natural top line of brow. Once applied, brush hairs up and over the line drawn to give depth, not a change in colour as such.
Lip
The beauty about this lip is you can really do anything.
Everything else is so nude and natural that for day, you can opt for a neutral lip shade, then at night, pop on a bold shade for a complete upgrade of your look.
The results are endless – start with one look for day then after 5pm, add 2-3 products and the look is reborn for night.
Follow Michael Brown: Website | Facebook | Twitter | Instagram


