
Eyes are often named the hardest area of the face to make up, but it all comes down to understanding where to place highlight and shade. This is key for any re-shaping that may need to occur, especially when lifting the eyes is concerned.
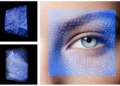
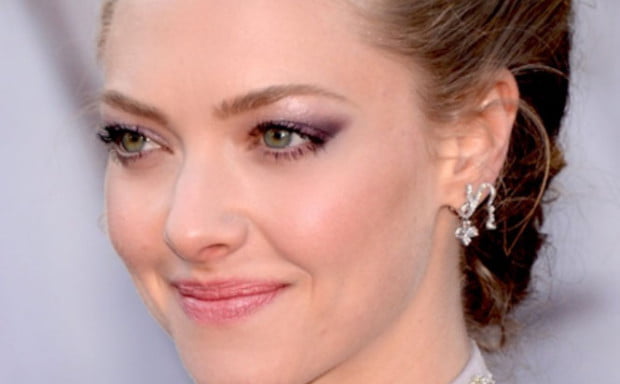 image via zimbo
WHY THE LIFT
No matter what the age, most women do think about that extra lift they could have to their eyes and a little outer wing with a shade tone is the perfect answer.
Just applying eyeliner to the upper and/or lower lash lines alone wont always change, or in this case ‘lift’, the eye area. This will only define the eye shape you have. It’s all to do with the actual eye area and the space/skin within it, not just defining the eye shape.
When your eyes are open, look forward naturally and see the eye space you have; If you have a heavy lid or any puffiness above the upper lash line, and this area is left bare with no shading applied, the area will not change or look anymore lifted.
This concern is best masked by applying the smokey eye technique. Deeper application at the lash line, then blended up the eye for a smooth gradation of colour.
MB PRO TIP:
Applying eye makeup when the eyes are open is a great way to see what needs correcting. It shows the natural placement of skin around the eyes.
Anything coming forward (like puffiness) if it is shaded, it will recede the area, making the eyes lifted.
For someone who has a downturned outer eye, either because of the natural eye shape, or because of increased puffiness over the years, applying some shade in the outer area can instantly lift and re-shape the eye area.
Leaving it bare, or only applying eyeliner will only define the eye, not change the skin around it. Therefore applying shadow in the area of concern will recede and lift.
HOW IT WORKS
Understanding highlight and shade: The art of makeup artistry, solves pretty much everything in makeup application.
Highlight
Adding light to the face, which then reflects to promote an area forward. This usually plumps an area and appears larger.
Shade
Adding depth to the face, which then defines the face to add structure and recede an area. This can hollow out areas that appear larger or puffy on the face.
Using this method of highlight and shade is known as contouring, but that doesn’t just mean it applies the to the face. The highlight and shade principles apply to any area of the face, even when using colour to bring areas of the face either forward or back.
EYE MAPPING
Even when you understand what applying highlight and/or shade can do to an area, it is important to know the common areas of these practices for the general eye area.
Usually the eye socket is the part of the eye that can show signs of ageing.
The upper eye skin can get weak, puffy and therefore drop with age, starting with the outer and eventually working inwards.
Therefore, applying a shade tone to the socket area can recede this heavy eyelid look and create a more open eye.
Yes having a more open eye can give some lift, but it’s the outer eye that will give the most lift, hence why most makeup looks have more depth on the outer eye, than the inner. Depth recedes and can re-define an area.
The opposite to applying shade is the highlight points and these are in 3 main areas:
– Inner eye tear duct
– Mobile Eyelid
– Peak of brow
These points will all reflect light once highlighted (you can choose any depth of highlight you want to suite the overall look) and bring that point forward as a focal point.
When applied next to a shade area like the socket or outer wing, a contrast is created for an even higher effect of highlight and shade.
Shadow Wing ‘How To’
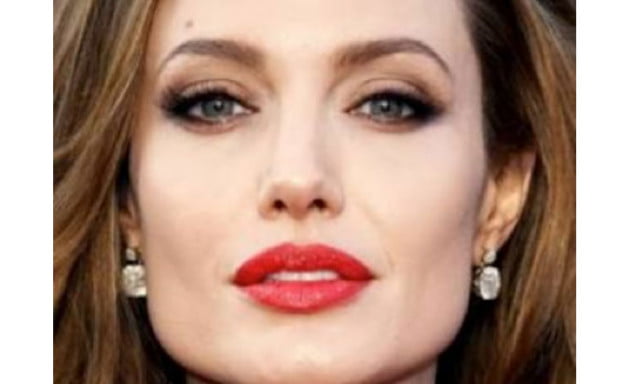
image via zimbio
A shadow wing can work well on any eye area, but especially lifting for those eyes that may be lacking in an upward outer lift.
Once your general eye makeup is applied – usually a little socket shading, slight highlight on the mobile lid, its then time to move to eyeliner.
Using an angled brush with the depth of eye shadow of your choice work the outer depth on the lower lash line first.
The angled brush makes it easier to follow the line of the eye into an upward position.
The aim of the game is to lift the outer eye point and exaggerate it by blending the shadow up on a diagonal.
MB PRO TIP:
To find the perfect outer wing angle, place a brush or pencil at the side of your nostril, then diagonally up to the outer eye point. This will give you the angle your shadow liner needs to follow.
Anything lower can pull the eye area downwards.
Once your lower lash line depth has been applied and slightly exaggerated following your diagonal line, start applying shadow to the upper lash line.
This way the bottom lash line creates the upward lift you want and the top line joins in perfectly to continue this line.
If you only use the top line to create your outer wing, sometimes it can cause a dip when you open your eyes, so its best to map your outer wing when eyes are open and in a normal position.
So ladies, know your highlight and shade tones, map your eye when open and use an angled brush on the lower lash line first to create your upward lift.
Youthful, lifted and modern results, every time!
Follow Michael Brown: Website | Facebook | Twitter | Instagram


