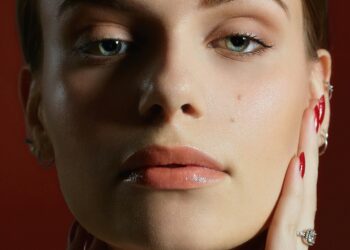
With a camera flash everywhere we turn these days, it’s hard to avoid at least one bad shot of ourselves every now and then– Thank god for the untag button!
Even with our new best friend, ‘the filter’, we can still have a photo makeup mishap, which can be avoided with a few little tips and the correct products of course…
By Michael Brown.
For a long period of time, the ‘White’ face look in photographs was a big fear of many women.
It was such a common occurrence in the 90’s as matte foundation was all the rage and a very powdered look was seen as beautiful.
My own grandmother had a very Geisha look in photos as she had an olive complexion, but used to wear a very thick, matte foundation! In real life it looked fine, but under the light of flash photography it would blow out any colour she had in her skin, leaving her face ultra white – not good.
In this case, her skin was covered in a very flat product and was very powdered, so when the flash went off there was no reflection of light, instead it all landed on her face in one go, blowing it out leaving a result of no colour.
In 2013, we are much more aware of light reflecting particles built into our foundations and the silky, moisturized look of dewy foundations and anti-aging products are much more popular than the thicker matte versions my grandmother used to wear.
This means once a flash goes off and hits the face, it is then reflected away from the face, not blowing it out with light, leaving the correct tone of skin to show through on the photograph.
Matte foundations do give a lovely smooth looking finish, but only on very good, hydrated skin. If your skin has any form of dehydration, matte finishes make the skin look dryer – same can be said with wrinkles, matte foundation can make them show up more as there is no ‘freshness’ or ‘realness’ of skin with a matte foundation.
In saying that, everything has it’s place and a modern matte foundation is perfect for an oily, (not just in the T-zone, but all over) or skin with large pores as it would perfect the skin by smoothing it out as well as keeping it shine free longer. Because the skin has its natural shine of oil, it almost creates a light reflection of it’s own.
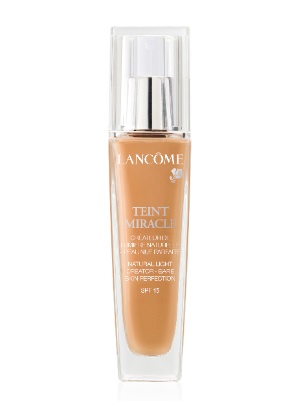
My fave Light reflecting foundation comes from Lancôme, Teint Miracle! ($68)
It is light in texture, buildable coverage, plus gives realness to the skin with its skin adapting pigments. Definitely no white flash face with this beauty!
To always guarantee a true skin look in photos, always choose correctly in shade – don’t go too pale or too much darker than your own skin tone.
It is best to match your exact skin colour, this avoids any discolouration with a flash.
Choosing too pale can make skin look even paler in photos, as it will enhance the difference in colour from face to body. Choosing too dark can sometimes look muddy or patchy, as it is harder to blend and streaks can appear when the flash goes off – fail!
MB TIP – If you know you are having photos, always dust a thin layer of bronzer over the face as it adds warmth so your skin tone appears natural and healthy, not too light. It might look perfect in real life, but always test before you leave the house on your camera phone to see how the look is under a flash.
Anyone using an old school matte foundation would find their skin always that little bit lighter (or a lot if you apply powder as well), so try to upgrade to a modern day matte as the texture will be lighter, not creating a mask effect that can cause skin colour issues under a flash.
Avoid over use of powder and try to purchase a light reflecting, translucent powder to set or use to control shine, rather than a matte or coloured powder, which adds coverage.
Some powders are very dense and therefore add a film over your foundation, matting out the skin so much it takes away the beauty of real skin, even if your foundation is of high quality and has light reflecting properties.
Powder should be very fine, talc free is good and it should not over power the foundation so it still looks like real skin once applied – it is simply to control shine for me.
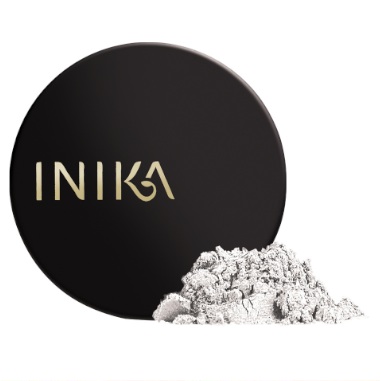
My fave powder and I use it on every red carpet or shoot that I work on is the Inika Mineral Setting powder ($40). It is translucent so looks white, but blends so well to skin, but never shows up in my work with flash photography. It does not alter the way my foundation/skin should look like some other thicker/coloured varieties – no mask!!

Highlighters have been a great introduction to creating a hydrated realness to skin and foundations.
It adds light to the face on the highpoints (frontal bones), so that when any light hits the face, including a flash, the light reflects away from the face not blowing out colour or skin tone, plus not focusing on dehydration or ageing = win!
Be careful though under flash photography that you have tested your highlighter as some of the denser, cream varieties can show up in flash photography, especially if very silver in colour.
My suggestion is to always go with a very liquid, light textured highlighter as these seem to adapt/bond to your skin easier, not then sitting on top alone, which can attract light almost too much to then focus on it in the photo.
Try and have a more skin tone highlighter, not overly silver as these will look great and fresh in real life, but under the flash can over focus on them and show up as silver streaks on the photo.
Also with photos being taken so regularly these days, we can often appear so shiny if we are over highlighted – our cameras do not always know the difference between beautiful sheen and an oily shine.
If you want to create beautiful highlights on the skin and have photos, especially on camera phones, apply your highlighter then add the mineral setting powder lightly in dabbing movements with the brush so they are not disturbed, yet toned down for a beautiful sheen to come through in flash photography.
I love Burberry Beauty, Fresh Glow ($51). It can be used as a highlighter under foundation, mixed in or as I like to use it, over foundation.
Because it is not too white or silvery, it creates very natural skin highlights on all points of the face like cheekbones, brow bone, cupids bow etc.
MB Tip – Don’t OVER highlight! Too much shine, either on the face or the eyes can over do it when it comes to flash photography – have balance and know that tones can be altered under a flash, especially silvers.
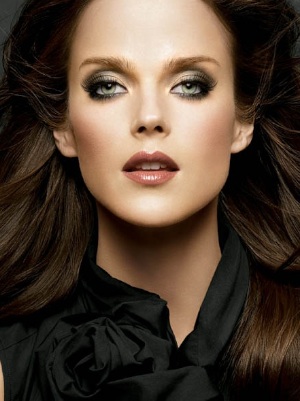
Lastly, with your eyes, make sure you use a base colour under your main eye shadow colours, or if you are not wearing a lot of shadow, at least have a matte base colour in a taupe/caramel or bronzer style shade as a base.
Shading or contour is needed around the lid/socket area of some sort to make sure once a flash goes off, the space from socket to brow does not look too bright and therefore come forward with the flash and make your eyes look smaller.
Leaving your eyelids bare, too light in colour or over highlighted can really make that area of the eyes look larger in flash photographs, therefore pushing eyes down making them look smaller. It is best to shade, even with the most natural tones, but still slightly darker than your skin tone, to create socket definition, to then avoid a small/squinty eye look when under a flash.
Avoid silvers, glitters, metallic to avoid makeup mishaps with the flash ladies, happy snapping this weekend with a little light reflecting and a mix of balanced matte and sheen skin and eyes.
By Michael Brown
Twitter: @mbrown_beauty
Facebook.com/michaelbrownbeauty
See Michael Brown LIVE at Rescu. Me! The Ultimate Life Makeover Event


