
They say that ‘behind every successful man is a woman’; well behind every successful Makeup Artist are their brushes!
A good quality makeup brush can certainly be the difference between a generic day makeup to a celebrity red carpet result… It’s all in the blend and precision of each brush stroke to mold and re-structure the face to give it the lift we sometimes need. Over the years I have applied makeup with cotton balls and cotton buds and still created wearable ready looks, but a good brush with perfectly tapered bristles is a dream for anyone applying makeup.
You don’t particularly need a hundred different brushes, you jut need the right shapes for what you are trying to achieve. Angled, round, pointed tip and flat are definitely all must-haves for brushes, yes there are different sizes of these, but you can really get away with fewer than what you think.
Foundation Brush
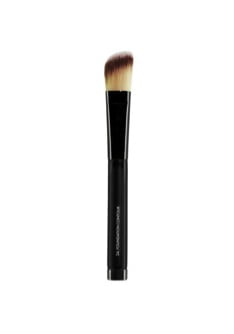
I love a good foundation brush and there are varied styles to choose from. My fave for the everyday woman is one with a flat, yet tapered edge – nothing to thick! Once the brush starts to get thick, the bristles will start to fan and then leave streaks as it sweeps over your skin.
Foundation should be undetectable; therefore it’s the brush that can do this for you with its perfectly tapered thin edge. The thin edge will transport product across the skin: the thinner the edge, the more natural the makeup with no build up left to be seen.
I also use this brush during makeup as a blending tool and/or like a little eraser – its great to smooth away edges.
MB PRO TIP – Always start foundation application in the centre of the face, sweeping outwards to avoid makeup build up lines! For more coverage, apply with a dabbing/press and roll action on problem areas only.
Contour/Cheek Definer
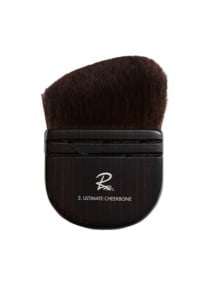
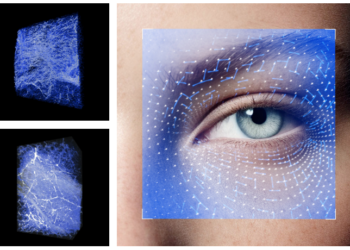
With anti-ageing being a big trend in makeup, we are now focusing more than ever on contouring – shading under bone areas to lift and recede away unwanted skin to re-structure the face.
This tool is perfect for its angled edge. This particular brush has no handle and of course any angled brush with this shape will do a great job, but I love the control I have with the above shape. An angled brush of any size is very handy to sharpen edges, but blend at the same time.
When applying with a bronzer for example for shading purposes, the lower height end should hold most of the product, leaving the tip free. This means as I apply under the cheekbone to create a lift, I apply colour with the small end wile within the same brush stroke, the larger side will blend – genius! This two-in-one action creates beautiful contouring every time.
It also can be used as a wash across the eyelid and the rounded higher end can be used for powder around the T-Zone or as a blush for the apple of the cheek to save in buying too many brushes.
MB PRO TIP – Start your under cheekbone contouring from the hairline and sweep towards the end of your nose, not mouth as towards the mouth can drag the face down and create a long effect.
Medium/flat eye shadow
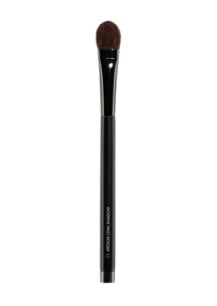
Everyone needs that blending brush that can buff out edges through the socket, but also get our base contouring shades perfect on the eyelid. Yes this brush is great for blending, but it is also amazing being more a soft flat for the eyelid – for colour or contour.
I like to use this brush with my bronzer across the eyelid to contour, working the socket and sweeping up and out to create lift with its soft edges. I can then dab and press more concentrated shading on the mobile eyelid, or even use colour, dabbing only on the mobile lid.
Once the overall eye shadow look has been applied, this brush is perfect to blend all shades used together, or mainly around the socket.
MB PRO TIP – To avoid fall out I generally use a dabbing action when first applying pigment to eye, once it is transferred, then use a sweeping movement when necessary
Detail Point Shadow
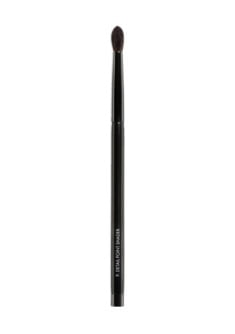
The lash line area and socket line needs defining and with a soft rounded edge, it creates the perfect smokey eye.
Once your base contour shade has been applied and washed across the eyelid, to add detail I use a soft rounded point brush. I start in the socket when eyes are closed to define, but always open the eye to see if the define is visible once skin around the eye has adjusted in the open position.
This is definitely my go-to smokey eye brush for the lash line – pin point enough to get close to lashes, but soft and round enough to create a smokey edge with no harsh lines.
MB PRO TIP – Dip the tip into a tiny amount of water, then when used with shadow it will give a more concentrated amount of pigment for more wow factor!
Eyeliner, Concealer, Lip
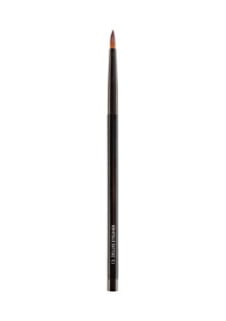
I am all about multi-tasking… If you really don’t need it, double up!
This type of brush is thin enough for a gel or liquid eyeliner – even wetting the tip to create an eye line with eye shadow, great for concealing around the nose or pin pint areas ad I have used it also as a lip brush to save carrying too many brushes – its all about convenience, time saving and cost effectiveness.
I love this brush for all three uses, but especially defining the eye line with a gel or liquid liner! Liquid liners come with a brush, but mire than likely I use a separate eyeliner brush for better control.
MB PRO TIP – Outer wing flicks can only be created correctly when you have seen the finish point of the wing when eyes are open… Otherwise if you only apply with eyes closed, you can get a false finish point as the skin can move/change when eyes are open.
Brow Filler
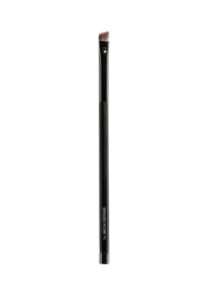
Although not everyone fills in the brow, if you don’t, you should!
The brows are the frame for the face, they can be anti-ageing when the right size and they can re-shape the face when shaped the opposite to your face shape to give balance. I don’t like to define them as such, but fill in any gaps and give them some depth.
I love angled brushes as mentioned earlier and for the brows it is the same principle – apply brow powder to smaller brush side, then as you sweep, the longer side blends automatically!
I generally apply a thin layer of brow powder just above the natural top brow hairline to give more shape and depth, and then to avoid a line, brush up the brow hairs over it to hide the line, but still giving the illusion of fuller brows!
MB PRO TIP – You don’t have to match your brow powder exactly to your brow colour… I generally use a grey/taupe type tone as you are filling and creating density rather than a placed, drawn on shape – going slightly lighter with your brow colour will not make them loom too drawn on!
So ladies, six brushes is really all you need to master a celebrity result…
Yes there are so many more brushes to pin point every makeup concern, but with practice and knowing your face, these six can make a makeup difference to your lives!
P.S Each pictured brush comes from RaeMorris.com and all the handle brushes above have a magnetic bottom — absolutely genius for drying upside down after washing, or standing up when working for the makeup artists out there.


